
Introduction
Setting up ERPNext for a small shop is not just about installing software—it involves aligning your business operations, inventory flow, accounting structure, and customer handling into a unified system. ERPNext provides a modular architecture that allows small retailers to digitize billing, manage stock, track suppliers, and maintain financial accuracy in real time. For a small shop, the implementation must be lean, efficient, and scalable without unnecessary complexity. This guide walks through a deeply structured setup approach, covering backend configurations, workflows, logic design, and real-world usage patterns. Each section includes step-by-step processes, system behavior explanations, and best practices tailored specifically for small retail environments. By the end, your ERPNext system will be production-ready with optimized workflows.
1. Understanding Small Shop Requirements Before Setup
Before installing ERPNext, it is critical to map business requirements such as daily sales volume, number of products, billing type (POS or invoice), and supplier cycles. This step defines the system architecture and avoids unnecessary modules. A small shop typically requires POS, Inventory, Accounting, and basic CRM. The process begins with identifying transaction flow—from purchase to sale. Conditions such as GST compliance, multi-payment modes, and stock valuation must also be defined. Workflow includes purchase → stock entry → sale → payment → accounting entry. Avoid over-configuring modules like manufacturing unless needed. Best practice is to document current manual processes and map them into ERPNext equivalents. Steps: 1. List products and categories 2. Identify billing process (POS or manual invoice) 3. Define supplier and purchase frequency 4. Decide tax structure (GST slab) Table:
| Requirement | ERPNext Module |
|---|---|
| Billing | POS / Sales Invoice |
| Stock | Inventory |
| Accounts | Accounting |
2. Installing ERPNext (Cloud vs Local Setup)
ERPNext can be deployed either via cloud hosting or local server installation. Cloud setup is faster and requires minimal technical knowledge, while local installation provides more control and customization. The architecture differs significantly: cloud uses managed hosting, while local setup requires Frappe framework installation. The process includes installing dependencies, creating a site, and deploying ERPNext app. Conditions include system compatibility (Linux recommended). Best practice for small shops is to use cloud unless customization is required.
Steps (Local Installation):
1. Install Python, Node.js, Redis
2. Install Frappe Bench
3. Create new site
4. Install ERPNext app
Code:
bench new-site shop.local
bench get-app erpnext
bench --site shop.local install-app erpnext
Workflow:
User → Server → ERPNext App → Database → UI
3. Initial System Configuration and Setup Wizard
After installation, ERPNext provides a setup wizard to configure company details. This step initializes core records like company, currency, fiscal year, and chart of accounts. The backend automatically generates default accounting structures. Process involves entering company name, business type, and currency. Conditions include selecting the correct country to enable tax templates. Best practice is to carefully configure fiscal year and chart of accounts as it impacts all transactions. Steps: 1. Enter company name 2. Select country and currency 3. Define fiscal year 4. Create admin user Workflow: Input → Validation → Database Entry → System Initialization Architecture: Frontend Wizard → Backend Controller → Database Tables (Company, Account)
4. Setting Up Users and Roles for Shop Staff
User management is essential for controlling access to ERPNext. Each staff member should have roles based on responsibilities such as cashier, manager, or accountant. The system uses role-based permissions to restrict access. Workflow involves creating users, assigning roles, and defining permissions. Conditions include restricting financial access for non-admin users. Best practice is to follow the principle of least privilege.
Steps:
1. Create user
2. Assign role (Cashier, Stock Manager)
3. Define permissions
Code (Role Permission Example):
Role: Cashier
Permissions:
- Read: Item, POS
- Write: Sales Invoice
Table:
| Role | Access |
|---|---|
| Cashier | Billing Only |
| Manager | Full Access |
5. Configuring Chart of Accounts for Small Shop
The chart of accounts defines how financial data is structured. ERPNext auto-generates accounts, but customization is often required. For a small shop, keep accounts simple: Sales, Purchase, Expenses, Cash, Bank. Workflow includes mapping transactions to accounts. Conditions include GST accounts and tax ledgers. Best practice is to avoid unnecessary account creation.
Steps:
1. Review default accounts
2. Add required ledgers
3. Map accounts to transactions
Architecture:
Transactions → Account Mapping → Ledger Entry → Financial Reports
Example:
Sales Invoice → Credit Sales Account
Payment → Debit Cash Account
6. Setting Up Items and Item Groups
Items represent products sold in the shop. Proper classification using item groups improves reporting and stock tracking. Workflow includes creating item groups, defining items, and setting units. Conditions include stock vs non-stock items. Best practice is to use consistent naming conventions. Steps: 1. Create item group (Groceries, Electronics) 2. Add items 3. Define UOM Table:
| Item | Group | Stock |
|---|---|---|
| Rice | Groceries | Yes |
| Soap | Daily Use | Yes |
7. Inventory Setup and Stock Management Logic
Inventory is the core of a small shop ERP system. ERPNext tracks stock using warehouses and valuation methods. Workflow includes stock entry, stock movement, and stock reconciliation. Conditions include choosing FIFO or Moving Average valuation. Best practice is to maintain accurate stock entries to avoid mismatches.
Steps:
1. Create warehouse
2. Add opening stock
3. Enable valuation method
Code:
Valuation Method: FIFO
Stock Entry Type: Material Receipt
Architecture:
Stock Entry → Warehouse → Ledger → Reports
Process Flow:
Purchase → Stock Entry → Warehouse → Sale → Stock Reduction
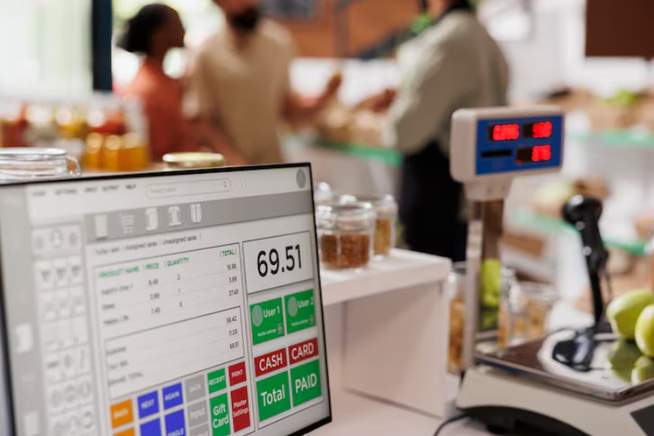
8. Setting Up POS (Point of Sale) System
POS is essential for fast billing in small shops. ERPNext POS supports offline mode, barcode scanning, and multiple payment methods. Workflow includes creating POS profile, assigning warehouse, and enabling payment modes. Conditions include internet connectivity for sync. Best practice is to optimize POS interface for speed. Steps: 1. Create POS Profile 2. Assign warehouse 3. Add payment methods 4. Enable offline mode Workflow: Customer → POS → Invoice → Payment → Sync Table:
| Payment Mode | Description |
|---|---|
| Cash | Direct payment |
| UPI | Digital payment |
9. Purchase Workflow Setup (Supplier to Stock Flow)
The purchase workflow defines how goods enter your shop inventory from suppliers. ERPNext follows a structured flow: Supplier → Purchase Order → Purchase Receipt → Purchase Invoice → Payment Entry. This ensures stock and accounting are synchronized. The backend automatically generates stock ledger entries when a purchase receipt is submitted. Conditions include whether you receive stock before invoice or vice versa. Best practice is to always use Purchase Receipt to maintain stock accuracy. The system architecture ensures every transaction updates inventory and accounts in real time. Workflow automation can be configured to auto-create invoices from receipts. Avoid skipping steps as it leads to mismatched stock and financial reports. Steps: 1. Create Supplier 2. Generate Purchase Order 3. Submit Purchase Receipt 4. Create Purchase Invoice 5. Record Payment Workflow: Supplier → PO → Receipt → Invoice → Payment → Ledger Update Table:
| Stage | Impact |
|---|---|
| Purchase Receipt | Stock Increase |
| Purchase Invoice | Accounts Payable |
Stock Ledger Entry:
Item + Qty → Warehouse → Valuation Update
10. Sales Workflow Setup (Customer Billing Flow)
Sales workflow represents how products move out of inventory and generate revenue. ERPNext supports both POS and standard sales invoice workflows. The standard process is Customer → Sales Order → Delivery Note → Sales Invoice → Payment Entry. For small shops, POS is often preferred, but understanding the full flow is essential. Conditions include whether stock is delivered immediately or later. Best practice is to use Delivery Note for tracking dispatch separately. Backend logic automatically deducts stock on delivery and records revenue on invoice submission. Steps: 1. Create Customer 2. Generate Sales Order 3. Create Delivery Note 4. Generate Sales Invoice 5. Record Payment Workflow: Customer → Order → Delivery → Invoice → Payment Architecture: Sales Module → Stock Ledger → Accounts Ledger Table:
| Document | Function |
|---|---|
| Delivery Note | Stock Out |
| Sales Invoice | Revenue Entry |
11. GST and Tax Configuration for Small Shops
GST configuration is critical for compliance in India. ERPNext allows defining tax templates, GST rates, and HSN codes. Workflow includes applying tax rules automatically during transactions. Conditions include intra-state vs inter-state tax rules (CGST/SGST vs IGST). Best practice is to use Item-wise tax templates for accuracy. Backend calculates tax during invoice creation and posts entries to tax ledgers. Steps: 1. Enable GST in settings 2. Create tax accounts 3. Configure GST rates 4. Assign HSN codes to items Table:
| Tax Type | Rate |
|---|---|
| CGST | 9% |
| SGST | 9% |
| IGST | 18% |
Tax Rule:
If State = Same → CGST + SGST
Else → IGST
12. Payment Modes and Cash Flow Management
Managing multiple payment modes is essential for modern retail shops. ERPNext supports cash, bank, UPI, and card payments. Workflow includes configuring modes of payment and linking them to accounts. Conditions include handling split payments. Best practice is to reconcile payments daily to avoid discrepancies. Backend records each payment as a ledger entry, ensuring financial accuracy. Steps: 1. Create payment modes 2. Link accounts (Cash, Bank) 3. Configure POS payments Table:
| Mode | Account |
|---|---|
| Cash | Cash Account |
| UPI | Bank Account |
Payment Entry:
Debit: Cash/Bank
Credit: Receivable
13. Pricing Rules and Discount Logic
Pricing rules allow dynamic pricing based on conditions such as quantity, customer type, or promotions. ERPNext applies rules automatically during transactions. Workflow includes defining rules and linking them to items. Conditions include minimum quantity and validity period. Best practice is to test rules before applying in production. Steps: 1. Create pricing rule 2. Define conditions 3. Assign discount or rate Table:
| Condition | Discount |
|---|---|
| Qty > 10 | 5% |
| Festival Offer | 10% |
If Qty > 10:
Apply Discount = 5%
14. Stock Reconciliation and Adjustment Process
Stock reconciliation ensures physical stock matches system stock. ERPNext allows manual adjustments using stock reconciliation documents. Workflow includes counting stock and updating differences. Conditions include damaged or missing stock. Best practice is to perform reconciliation periodically. Steps: 1. Count physical stock 2. Create reconciliation entry 3. Submit document Workflow: Physical Count → System Compare → Adjustment Table:
| Scenario | Action |
|---|---|
| Shortage | Reduce Stock |
| Excess | Increase Stock |
Difference = Physical - System Stock
15. Advanced Debugging, Logging and Error Handling
In complex ERPNext website implementations, debugging becomes a critical part of development and maintenance. Since the system integrates frontend rendering, backend logic, database operations, and APIs, issues can arise at multiple layers. Understanding how to systematically debug these issues ensures faster resolution and improved system stability.
ERPNext provides detailed logging mechanisms that capture errors, warnings, and system events. Logs can be accessed through log files or the built-in error log DocType. These logs contain stack traces and contextual information that help identify the root cause of issues.
Developers can use the bench console to interact directly with the system and test queries or functions. This is especially useful for debugging backend logic and verifying data.
bench console
Error handling should also be implemented proactively. Using try-except blocks in Python allows developers to catch exceptions and log them appropriately without exposing sensitive information to users.
try:
    process_order()
except Exception as e:
    frappe.log_error(str(e))
On the frontend, JavaScript error handling can be used to display user-friendly messages. Proper debugging and error handling improve reliability and user experience.
16. Automation Using Workflows and Notifications
ERPNext allows automation using workflows and email notifications. Workflow defines approval processes for transactions. Conditions include approval limits. Best practice is to automate repetitive tasks like invoice approvals.
Steps:
1. Create workflow
2. Define states
3. Assign roles
Workflow:
Draft → Pending Approval → Approved → Submitted
Architecture:
Trigger → Workflow Engine → Action
Code:
If Amount > 10000:
Require Approval
17. Reports and Business Insights Setup
Reports provide insights into sales, stock, and finances. ERPNext includes built-in reports and custom report creation. Workflow includes selecting filters and generating reports. Conditions include date range and item filters. Best practice is to review reports daily for decision-making. Steps: 1. Open report module 2. Apply filters 3. Generate report Table:
| Report | Purpose |
|---|---|
| Sales Report | Revenue tracking |
| Stock Report | Inventory status |
18. Scaling ERPNext for High Traffic Applications
As your website grows, scaling becomes essential to handle increased traffic and data volume. ERPNext supports both vertical and horizontal scaling. Vertical scaling involves upgrading server resources, while horizontal scaling involves adding more servers.
Load balancing distributes traffic across multiple servers, preventing any single server from becoming overloaded. Caching using Redis reduces database queries and improves response times.
Content Delivery Networks (CDNs) can be used to serve static assets, improving performance for users in different geographic locations. Database optimization techniques such as indexing and query optimization further enhance performance.
bench clear-cache
Monitoring tools help identify bottlenecks and ensure that the system performs efficiently under heavy load.
19. Custom App Development and Extensibility
ERPNext allows developers to create custom applications to extend its functionality. These apps can include new DocTypes, custom scripts, APIs, and integrations. This flexibility makes ERPNext suitable for a wide range of business requirements.
Custom apps are developed using the Frappe framework and can be installed on top of the core system. This modular approach ensures that customizations do not interfere with core functionality.
bench new-app my_app
bench install-app my_app
Developers can also use hooks to modify system behavior and integrate with external services. This allows for highly customized solutions tailored to specific business needs.
20. Real-World Project Architecture and Best Practices
Building a production-ready ERPNext website requires careful planning and adherence to best practices. This includes designing scalable architecture, optimizing performance, and ensuring security.
A typical project architecture includes separate environments for development, testing, and production. This allows changes to be tested thoroughly before deployment.
Code should be modular and well-documented, making it easier to maintain and extend. Version control and CI/CD pipelines should be used to manage changes and automate workflows.
Security best practices include using strong authentication, encrypting sensitive data, and implementing access controls. Regular backups and monitoring ensure data integrity and system reliability.
By following these best practices, businesses can build robust and scalable ERPNext websites that meet their operational and user requirements.
Conclusion
ERPNext provides a powerful and flexible platform for building dynamic, data-driven websites that are deeply integrated with business operations. Its DocType-based architecture, Jinja templating system, and robust API layer enable developers to create highly customized solutions.
From initial setup and configuration to advanced topics like scaling, deployment, and custom app development, ERPNext covers every aspect of modern web development. Its ability to unify frontend and backend systems reduces complexity and improves efficiency.
By leveraging the techniques and best practices outlined in this guide, developers can build scalable, secure, and high-performance websites that support business growth and deliver exceptional user experiences.